Gadget is very useful thing for any Blogger Blog. Moreover, Gadget Title is also most important thing for a Blog. A beautiful Gadget or Gadget Title can easily makes a Blog page most attractive. You also can make a beautiful Gadget Title including any gadgets or widgets on your Blog like text, image, slide show, audio, video, game and many kinds of widgets. You don't have to know any programming knowledge to add these Gadgets. Really, it is a nice Technic. In fact, a Stylish Gadget Title can play important roll in a Blogger Blog.to increase the toll of visitors.
Today I shall introduce you an important and stylish as well as 3D Gadget Title Bar for Blogger Blog that you can easily add on side bar both right or left on Blog.
Today I shall introduce you an important and stylish as well as 3D Gadget Title Bar for Blogger Blog that you can easily add on side bar both right or left on Blog.
It is a very Stylish and 3D Search Box Title Bar Gadget. Usually many visitors come a Blog but it's seen that almost of time they leave pages not doing search anything. Because of the traditional design of Google search box. Moreover it's also not shown clearly on Blog pages. But when this Stylish Search Box Title Bar will be shown above the Google Search Box on your Blog then visitors will be easily attracted, at least the visitors will stop to leave from your pages also for a moment !!! So, why late? Get-rich-quick.
At first, press the DEMO button below to see live preview of this Title Gadget.
To add the Title Bar Gadget you must need to log into Blogger Blog with your Google account and then just follow the below instructions:
1. Go to Blogger Dashboard >> Layout
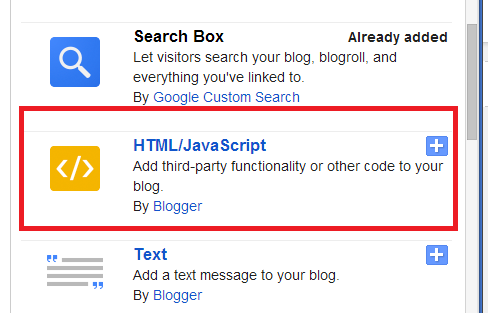
2.Click on Add a Gadget link above right side of layout (like below screenshot of new version)
<div class="separator" style="clear: both; text-align: center;"><a href="https://blogger.googleusercontent.com/img/b/R29vZ2xl/AVvXsEj7gQx4u0fkIqlOZyIF4s5OOLuvDs6slU1Jox-BaXot1OmUvip-NLmpZJlaKI2bgSoV8dy0GrqZEDexsSoekna2_dVbIN-xg1SUYOOtVwa_IZDK5AGvcsoeXUF5sHPK43duGq0Z7nKH5eSr/s1600/SEARCH++THIS+SITE.png" imageanchor="1" style="margin-left: 1em; margin-right: 1em;"><img border="0" src="https://blogger.googleusercontent.com/img/b/R29vZ2xl/AVvXsEj7gQx4u0fkIqlOZyIF4s5OOLuvDs6slU1Jox-BaXot1OmUvip-NLmpZJlaKI2bgSoV8dy0GrqZEDexsSoekna2_dVbIN-xg1SUYOOtVwa_IZDK5AGvcsoeXUF5sHPK43duGq0Z7nKH5eSr/s1600/SEARCH++THIS+SITE.png" height="40" width="320" /></a></div><div class="separator" style="clear: both; text-align: center;"><br /></div>
6. Click Save.
7. Now you drag and drop the gadget from top of the right side of Layout just above your targeted gadget (Title Related Gadget).
Ok! you have done, See View Blog .
Note: You can customize of this size editing this highlighted code height="40" width-"320" .


No comments:
Post a Comment